
We are pleased to announce the release of HelpSmith 10.0 (which you can download from our website) that includes a completely redesigned Web Help system format with a frame-less layout, adds modern ready-to-use style themes, provides an improved appearance editor, allows you to fully customize the Web Help’s template, includes new pre-built topic templates, improvements for SEO optimization, and other enhancements.
The Web Help format (or browser-based help) is one of the major documentation types and an efficient way to supply information on your product (for example, user guides, step-by-step instructions, UI documentation, etc.) to the end-users as it allows you to easily publish a full-featured help system on the product’s website, integrate the help system with your application directly, and also share links to the relevant topics with the customers, which can greatly save the time and effort spent on technical support.
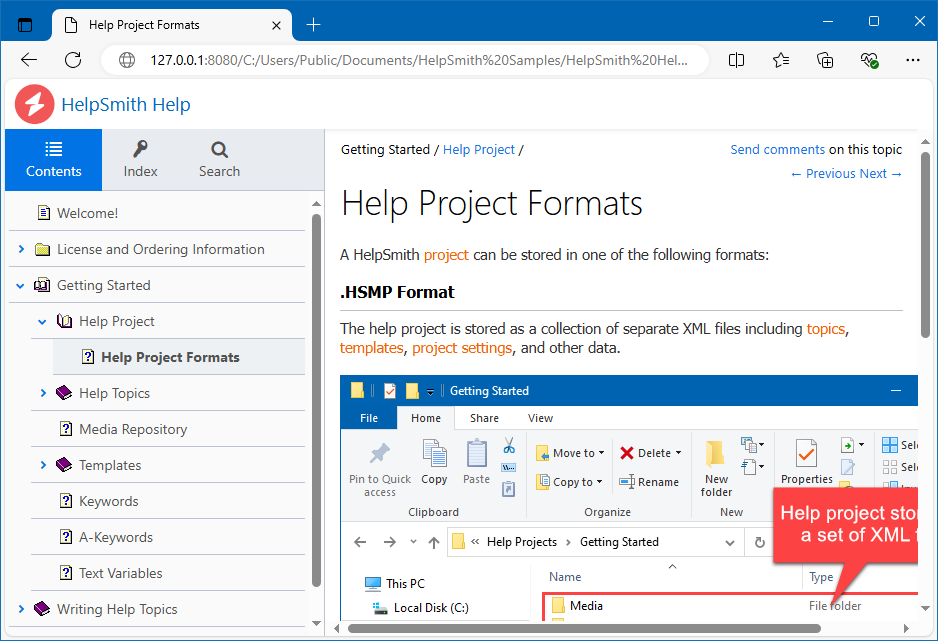
Redesigned Frame-less Web Help Layout with Enhanced Customization Options
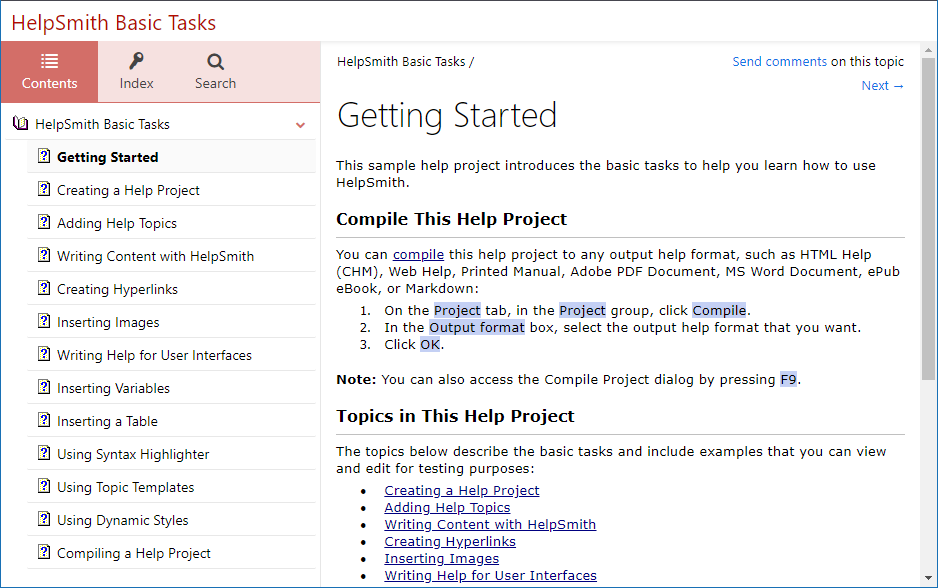
In HelpSmith 10.0, you can now create a Web Help system that incorporates a brand new layout that is based on the principles of a Single-Page application (SPA) which dynamically loads and displays the content of help topics and navigation elements without using frames (or iframes) elements, and thus, provides better experience to the end-users, complies with today’s web standards, and also meets modern Search Engine Optimization (SEO) requirements.
If you need to customize the appearance of your Web Help system, you can, as usually, apply one of the existing themes and style settings of individual elements through the UI without having to edit even a line of code. However, HelpSmith now also allows you to fully customize the Web Help system’s layout according to your own needs by editing the HTML/CSS code of the template.
Of course, if you need to add minimal changes to the Web Help’s layout, say, to set a company logo that will be displayed by the default template, you can do so through the UI without having to edit any code.
How to Set a Company Logo
- On the Project tab, in the Project group, click Project Options.
- In the Project Options window, go to the Web Help section.
- In the Logo box, click Change to select an image file from the Media Repository of the help project.
- Click OK.
Finally, it should be noted that the new Web Help system, similarly to its previous version, is fully responsive, meaning that your online documentation will perfectly work on desktop computers and on mobile devices including tablets and smartphones.
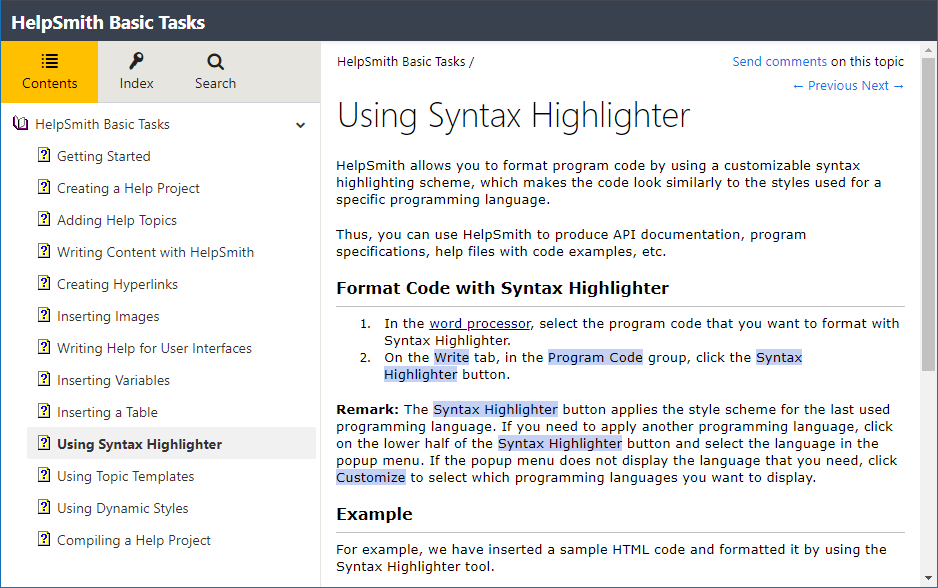
New Customizable Design Themes to Create a Professional Appearance
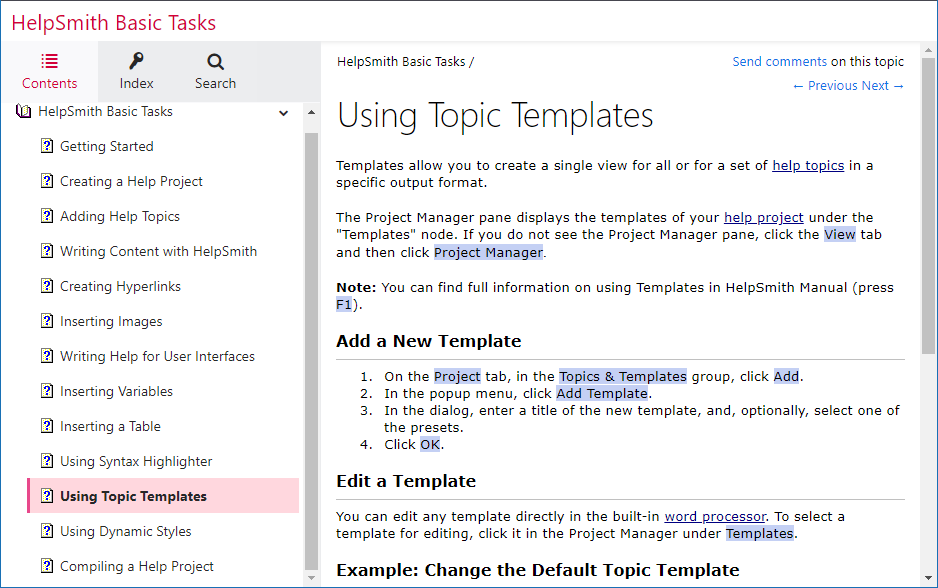
In HelpSmith 10.0, you will find an updated set of the customizable appearance themes that you can apply to your Web Help system, which make it easy for you to create a professionally looking help system just in a couple of clicks. However, you can also edit style settings of individual elements (e.g. Header, Footer, Tabs, Text Fields, etc.) in the selected theme, and thus, customize the appearance as needed.
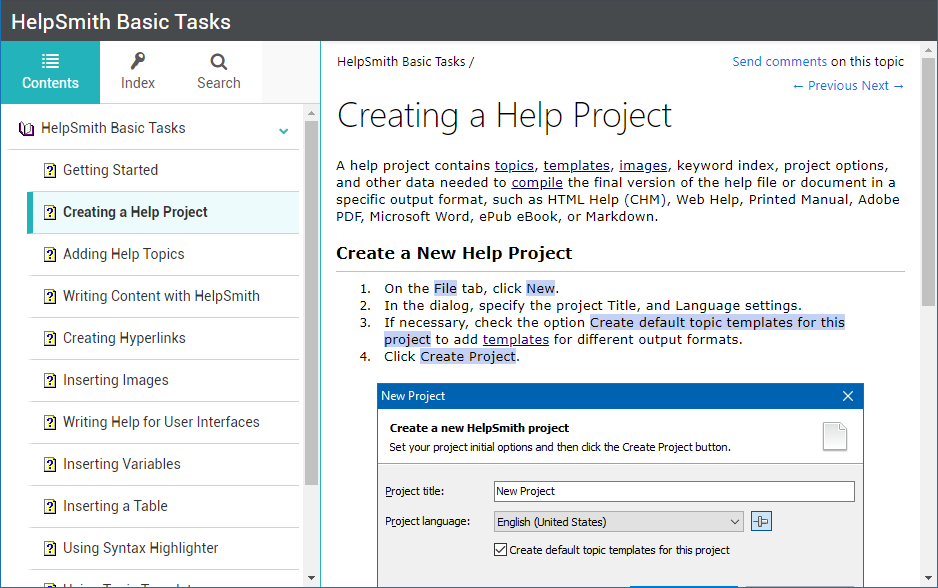
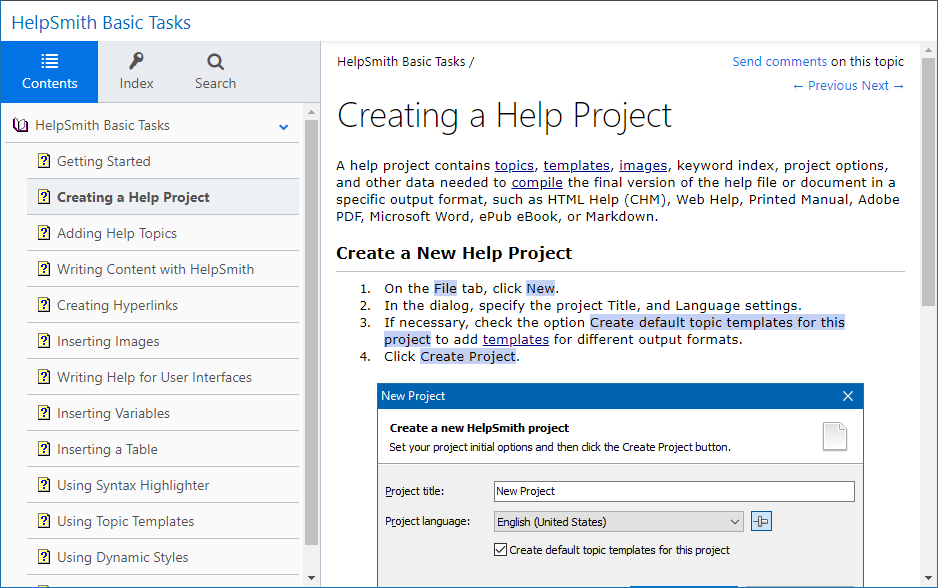
How to Change the Appearance of Your Web Help System
- On the Project tab, in the Project group, click Project Options.
- In the Project Options dialog, go to the Web Help|Appearance section.
- In the Style scheme, select an appearance theme (for example, Dark Elegance) that you want to apply.
- Click OK.
Remark: It should be noted that we have also retained the Classic styles schemes which can be used by existing help projects.
Edit Individual Elements of the Selected Theme in a Single Place
The new HelpSmith version also includes an improved Web Help appearance editor which allows you to pick the desired style scheme, select the elements that you want to modify, set the needed settings to these elements in a single window, and view the changes in the preview area.
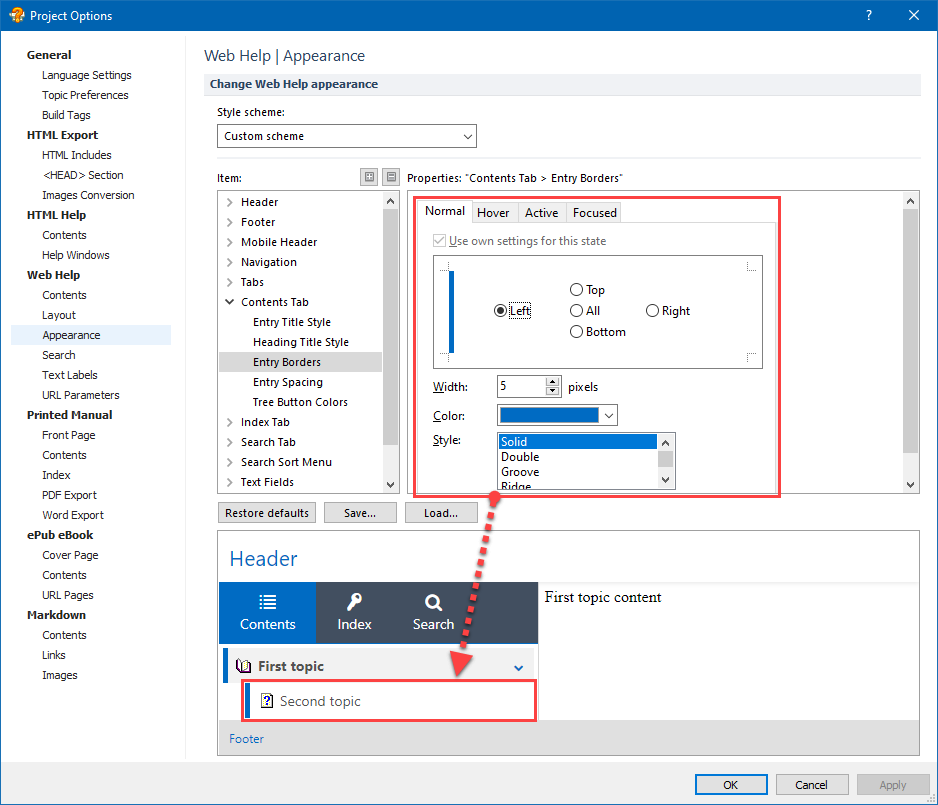
For example, if you need to customize the background and borders of the TOC entires, in the Web Help|Appearance section, under the Contents Tab node, edit the Entry Title Style and Entry Borders elements, and set the desired settings for them.
Get Full Control Over the Code of Your Web Help’s Template
With HelpSmith, you can not just apply and change the existing appearance themes, but fully control the template used by your Web Help system, and, if necessary, modify the layout by editing the template’s code.
The possibility to edit the template’s HTML/CSS code lets a web developer to change the position of the navigation elements, embed custom UI elements, integrate third party web services, implement any non-standard functionality, and so on. As a result, you get practically unlimited possibilities for Web Help customization!

Moreover, because a Web Help system operates as a static website that includes a TOC, Keyword Index, and Full-Text Search features, you can even modify the template to make it look and function like a regular website that you might use for publishing any type of information for your audience.
How to Edit the Code of the Web Help’s Template
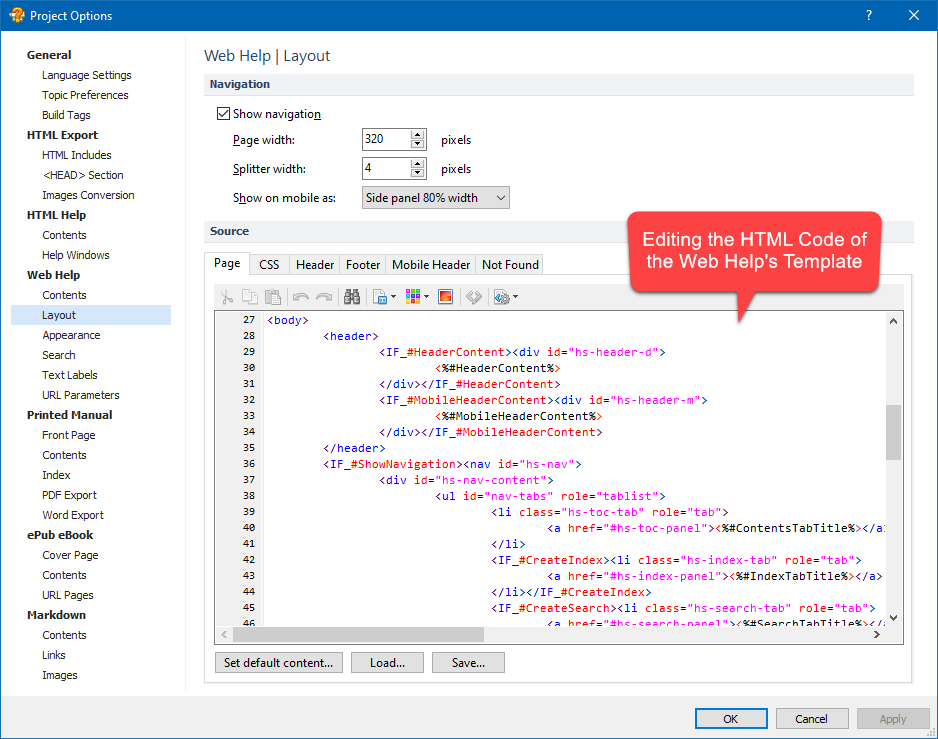
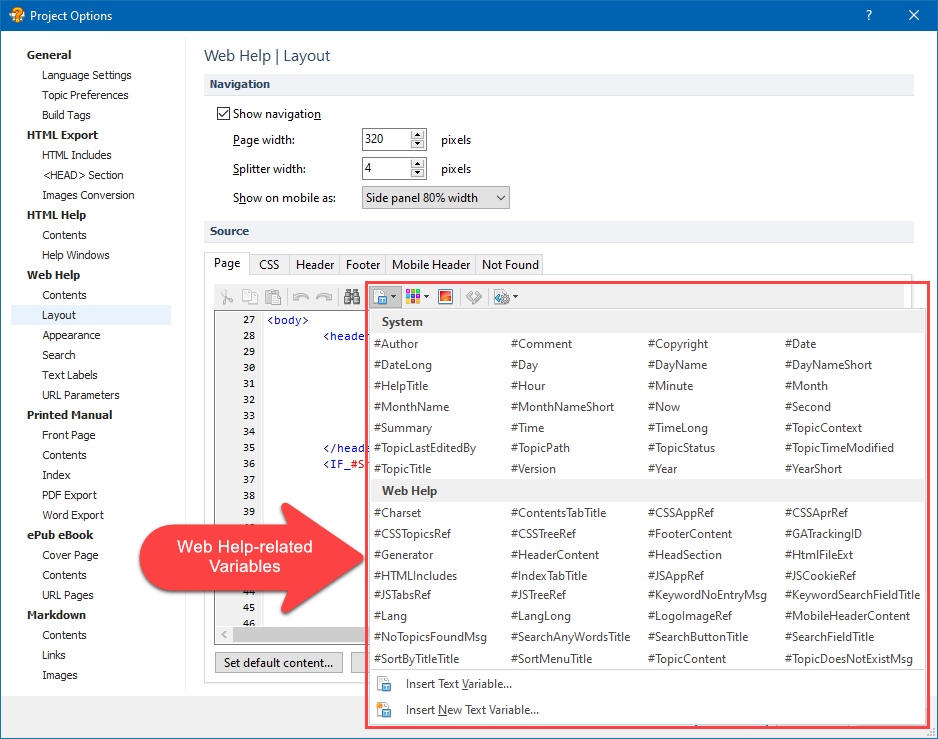
In HelpSmith, you can edit the template with a powerful code editor that allows you to insert general and Web Help-related text variables, easily insert images from the project’s Media Repository, and also use special conditions that determine if a specific element should be included.
- On the Project tab, in the Project group, click Project Options.
- In the Project Options dialog, go to the Web Help|Layout section.
- Use the code editor to modify the template’s HTML and CSS code.
- Click OK.
Finally, you can also change the default appearance and behavior of the Web Help system, thanks to the HelpSmith’s ability to include custom CSS styles and JavaScript code to your help project.
Integrate Your Web Help System with Your Application or Website Easily
If you need to integrate your Web Help system with your application or website, you can simply create links to specific topics by linking to the .HTML files of these topics. When the user clicks on such a link, it will open the referenced topic just like a regular webpage.
Since the Web Help system no longer uses frames/iframes, the linked topic will be displayed instantly without internal redirects, which also eliminates the known issue with the browser’s Back and Forward buttons which might not work properly in the previous version.

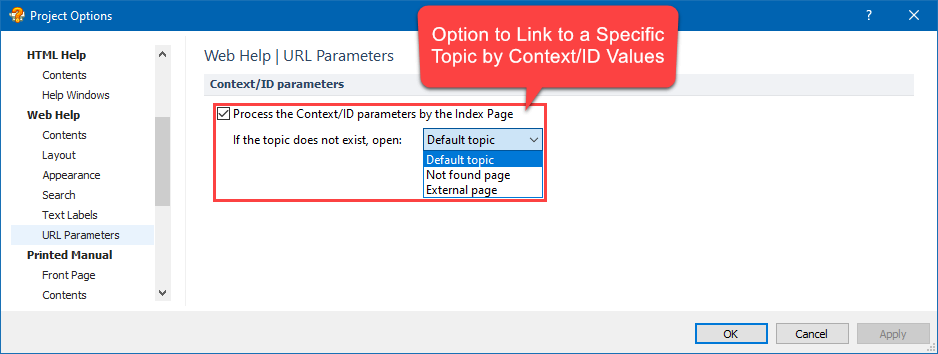
Remark: For backward compatibility, we have retained the option to link to a specific topic by the topic’s numeric Context value or by the textual ID value. However, while this option is enabled for existing help projects (so the existing links to your web help system will work normally), if you start a new help project, this option will be disabled by default.
Please note that to comply with the SEO requirements, you should use only a single way to link to a specific webpage. Otherwise, search engines will consider different links as duplicate content. This is why we recommend linking to topics by using the links to the topic files only.
Better Indexing and Ranking of Your Content by Search Engines
The Web Help system now stores the content of each topic in a stand-alone file which uses HTML5 tags, and is no longer displayed within an iframe element. This, in turn, makes it easier for Google, Bing, and other search engines to scan and index the content of your help topics, and completely eliminates potential issues related to the usage of frames.
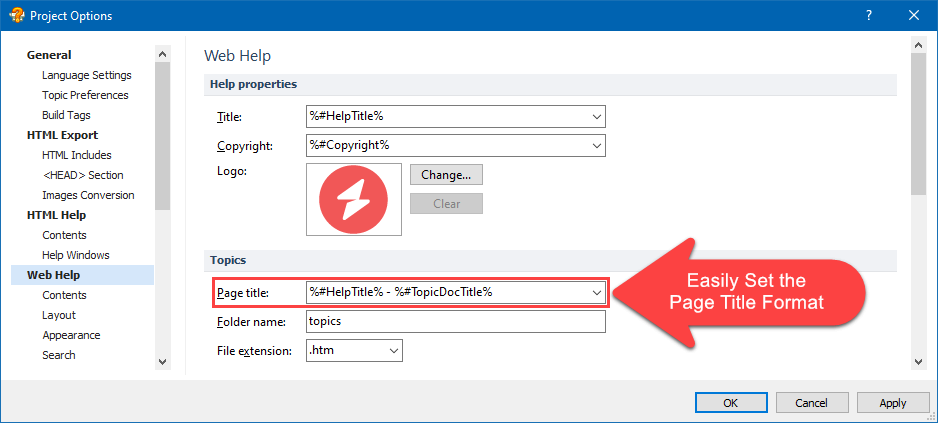
In addition, since HelpSmith allows you to define the format of the Web Help’s Page Title (for example: “Topic Title – Company Name“), add meta tags for individual topics (e.g. Description, Keywords, etc.), and set alternate texts for images, your help system can be optimized in full compliance with search engine requirements.
How to Define the Web Help’s Title Format
- On the Project tab, in the Project group, click Project Options.
- In the Project Options dialog, go to the Web Help section.
- In the Page Title box, specify the format that you need.
- Click OK.
Thus, HelpSmith allows you to create a SEO-friendly Web Help system whose pages are correctly indexed and ranked by search engines, thanks to the compliance with the actual SEO requirements!
Release Notes for HelpSmith 10.0
- Completely redesigned Web Help format with a frame-less layout.
- Added modern style schemes for Web Help system customization.
- Improved Web Help appearance editor now allows you to edit style settings of scheme’s elements in a single window.
- You can now fully modify the Web Help’s layout by editing the template’s HTML/CSS code.
- Added a new Corporate template which can be applied to the topics.
- You can now define the format of the Web Help’s Page Title (for example: “Topic Title – Company Name“, etc.).
- You can now set a company logo through the UI without editing the Web Help template’s code.
- Improved the Text Variables dialog: better presentation of variables, the ability to find variables by a keyword.
- Added an option to automatically expand a certain number of TOC node levels on the Web Help system startup.
- Improved the Template dialog: you can now easily select a pre-built topic template, view for which documentation formats a template is designed, etc.
- It is now possible to change the color used to highlight found keywords in the topics in a Web Help system.
- Web Help: you can now pass the “?search=some%20keyword” parameter to the URL string to display search results by a specific keyword. In addition, you can pass the “&match=phrase” parameter to activate the Phrase Search mode.
- The Web Help’s Search feature now indexes and finds not only the titles of topics, but also the titles of Web Page links in the TOC.
- The Web Help’s search results will now display the topic’s Document Title if it is different from the TOC item’s title.
- In Web Help’s Index, when clicking on a keyword associated with more than one topic, the topic selection dialog will display the topic’s Document Title if it is different from the TOC item’s title.
- Removed the XHTML Compliant and External Stylesheet options from the project options.
- The HTML Files Extension option was moved to the Web Help section from the general HTML Export section.
- If the keyword list is empty (for example, if the associated topics were excluded by Build Tags), the empty Index tab appeared in HTML Help and Web Help formats.
- The HelpSmith’s HTML Editor now allows you to use the </ENDIF> tag as an easier way to close the opened condition tag.
- Other improvements and minor bug fixes.
How to Upgrade
If you have a purchased license for HelpSmith 9.x for less than a year, you can upgrade to the latest HelpSmith 10.x (the same edition) for free. Otherwise, you can upgrade existing licenses to HelpSmith 10.x at a special price. To place an upgrade order, you can visit this link.
Download HelpSmith 10.0
You can download the latest HelpSmith version here.