
We are pleased to announce the release of HelpSmith 9.2 (which you can download from our website) that includes enhancements to the built-in Image Tool which now allows you to add annotations to Favorites, provides ready-to-use presets for different annotation kinds (e.g. rectangles, balloons, arrows, etc.), improvements to the XML Source Editor, new options for the command-line interface, and other enhancements.
Add Annotations to Favorites for Reuse
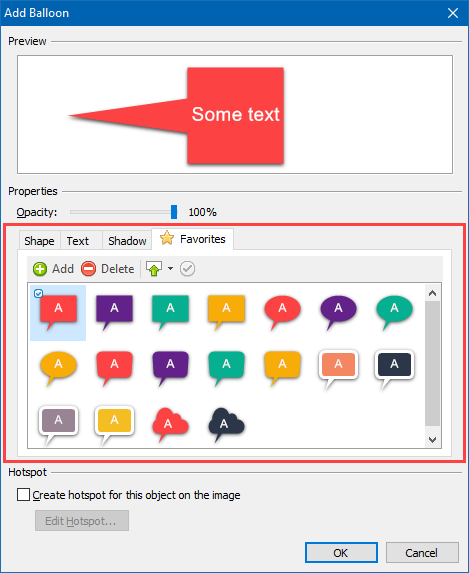
The HelpSmith’s Image Tool allows you to add various annotations to images, which are a great way to complement documentation texts and to efficiently communicate information on a topic to the end-users.
In HelpSmith 9.2, you can now add annotation styles (e.g. shape, color, font, border width, etc.), which are frequently used for images in your documentation to the Favorites section, and thus reuse a preferred style for the next annotation object.
How to Add an Annotation Style to Favorites
- In the Image Tool, in the left toolbar, select the annotation kind that you want to add.
- In the dialog, specify the annotation’s style settings.
- Go to the Favorites tab, and then click Add.
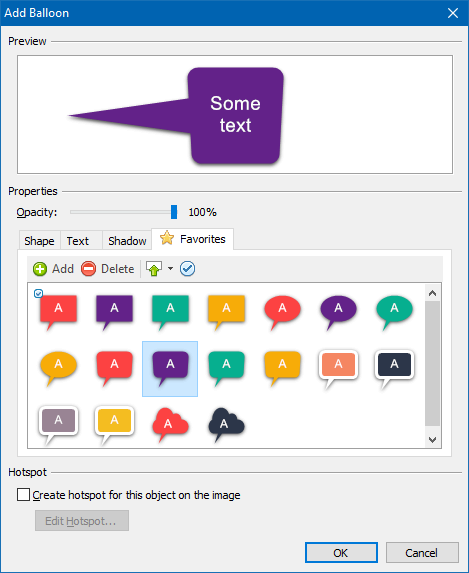
To apply a previously saved annotation style, go to the Favorites tab, and double-click on the annotation style that you need. If necessary, you can also click on the right half of the “Apply” button on the toolbar, which allows you to apply only selective settings of a saved annotation style, such as object style, text style, or shadow style.
Setting the Default Annotation Style
In addition, you can set the default annotation style, which will be used when adding a new annotation object of the same kind (e.g. balloon, text, arrow, etc.).
- On the Favorites tab, right-click on the annotation style that you need.
- In the popup menu, click Set as Default.
Ready-to-Use Presets for Various Kinds of Annotations
While editing settings of an arrow, balloon, rectangle, or another annotation kind, you can now apply ready-to-use presets which are also available on the Favorites tab in the annotation properties dialog.
We have added a collection of presets with different style settings, which makes the image annotating process even easier!
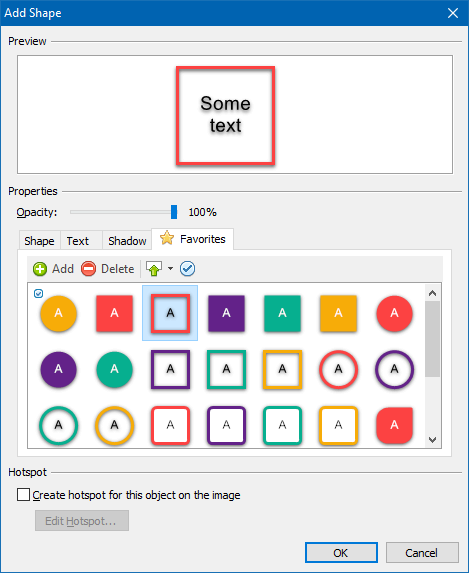

Thus, while creating the style of a new annotation, you can simply use any existing preset whose settings you can customize according to your needs.
New Shapes for the Arrow Annotation
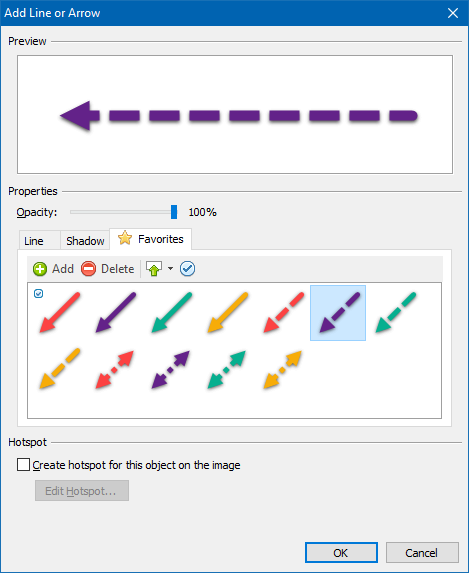
In HelpSmith 9.2, we have added two more shapes for the arrow object which you can use when you need to focus the user’s attention on an important element demonstrated on a screenshot.
As a benefit of the new arrow shapes, it is now possible to arrange text on the arrow taking up the full width of the object.
Swap Caps of the “Line or Arrow” Object
Another useful improvement related to the HelpSmith’s Image Tool is the possibility to swap the start and end caps of the “Line or Arrow” object, make the start cap the same as the end cap, and vice versa. So you can now setup properties of this annotation kind quickly.
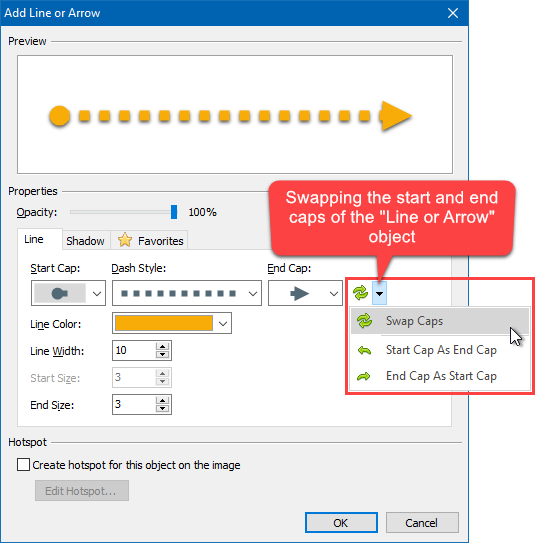
Of course, you can also use the Favorites tab to save the style settings which you have set for this annotation kind for future use.
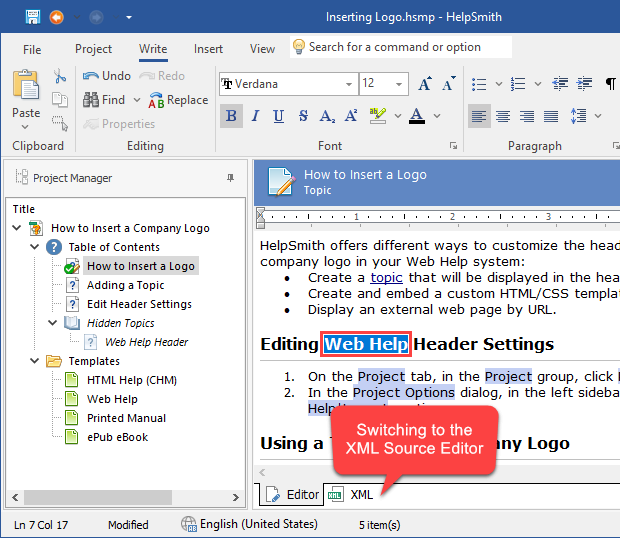
Find Selected Text in the Topic’s XML Source Code Easily
With the release of HelpSmith 9, which added support for the XML-based help project formats and the built-in XML Source Editor, it has become possible for a team to work on a help project collaboratively by using a version control system (such as Git/GitHub, Subversion, etc.), and also to translate a help project by editing help project’s files with external tools.
In HelpSmith 9.2, when you are switching to the topic’s XML code, the built-in XML Source Editor now positions the text cursor to the same text, and also selects the same text as in the visual topic editor.
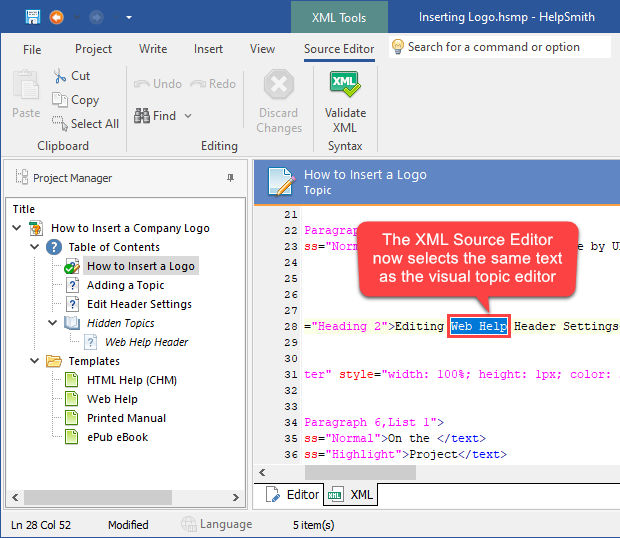
Thus, you can find the needed text, paragraphs, images, hyperlinks, tables, and other objects in the topic’s XML source code easily.
Remark: The built-in XML Source Editor and the ability to save a help project in the unpacked XML-based format are available in HelpSmith 9.x Ultimate and HelpSmith 9.x Terminal Server editions.
New Options for the Command-Line Interface
Many developers who create a help system for their software product use HelpSmith’s command-line interface as part of the automated build creation process.
For example, you can compile an existing help project file (.HSMX, .HSMP) and generate documentation in the target output formats, such as Web Help (.HTML), HTML Help (.CHM), or Adobe PDF, by using the following command line syntax:
It should be noted that the HelpSmith’s command-line interface allows you to specify Build Tags for the given compilation, and even re-define values of text variables which are used in the help project.
And based on the suggestions that we get from HelpSmith users, in the HelpSmith 9.2 update, we have implemented the following enhancements:
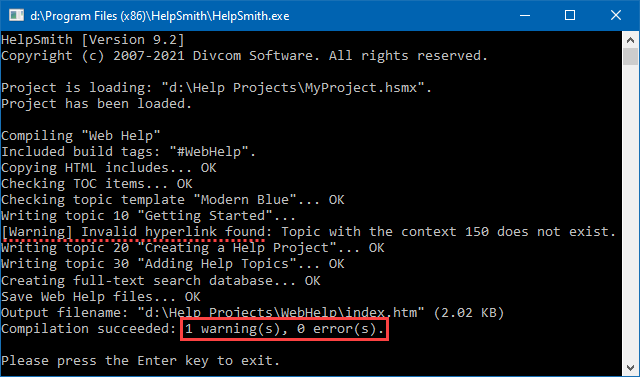
Close the Console Window Regardless of the Compiler Warnings
The /nc switch which you can use in the command line allows you to automatically close the console window provided that no errors or warnings are found during the compilation process.
Now you can also add an optional /nc=ignorewarn parameter, which means that the console window will be closed even if the compilation log contains warnings. Since warning messages do not interrupt the help system creation process, this option makes it possible for you not to break the product build creation process.
Include Topics with the Complete Status Only
When compiling a help file from the HelpSmith’s user interface, you can easily include only the topics that have the “Complete” status, and exclude topics with any other statuses (e.g. In Progress, Waiting Review, etc.) from the generated documentation.
In the command line mode, you can now also use the /cs switch (which means “Complete Status”) which enables you to include only the topics with the “Complete” status to the generated help file or document.
Release Notes for HelpSmith 9.2
- The Image Tool now allows you to save annotation styles (e.g. shape, color, font, etc.) to the Favorites tab.
- It is now possible to set the default style that will be used when adding a new annotation to an image.
- Ready-to-use style presets for arrows, balloons, rectangles, and other kinds of annotations.
- Added two new shapes for the arrow annotation object.
- The “Line or Arrow” object’s properties dialog now allows you to quickly swap the start and end caps, make the start cap the same as the end cap, and vice versa.
- The XML Source Editor now positions the text cursor to the same text, and also selects the same text as in the visual topic editor.
- Added the /nc=ignorewarn option which closes the console window even if warnings are found during the command line compilation.
- Added the /cs switch which allows you to include only the topics with the “Complete” status during the command line compilation.
- Other enhancements and minor bug fixes.
How to Upgrade?
If you have a license for HelpSmith 9.x (or for a previous version for less than a year), you can upgrade to the latest HelpSmith version (the same edition) for free. Otherwise, you can upgrade existing licenses to HelpSmith 9.x at a special price. To place an upgrade order, you can visit this link.
Download HelpSmith
You can download the latest HelpSmith version here.