
We are pleased to announce the release of HelpSmith 9.3 (which you can download from our website) that adds support for full-featured code blocks (with the ability to edit program code directly in the topic editor, and various customization options), allows you to update the style of multiple horizontal lines in your help project, improves export of headings in HTML-based documentation formats, and includes other enhancements.
Full-featured Code Blocks with Syntax Highlighting
In HelpSmith, you can use the Syntax Highlighter feature to format program code contained in a topic according to the style scheme of a specific programming language (e.g. C++, PHP, Python, Java, etc.) in which this code in written. Thus, you can use the help authoring tool to produce API documentation, program specifications, or simply demonstrate code examples in various languages.
In HelpSmith 9.3, when you apply a syntax highlighting scheme to the selected piece of code, HelpSmith now not only formats the code according to the rules of the selected language, but also inserts a full-featured code block.
So you can now define how the code block will look like in the compiled documentation by specifying its style settings, and, moreover, you can now edit program code with syntax highlighting right in the HelpSmith’s topic editor!
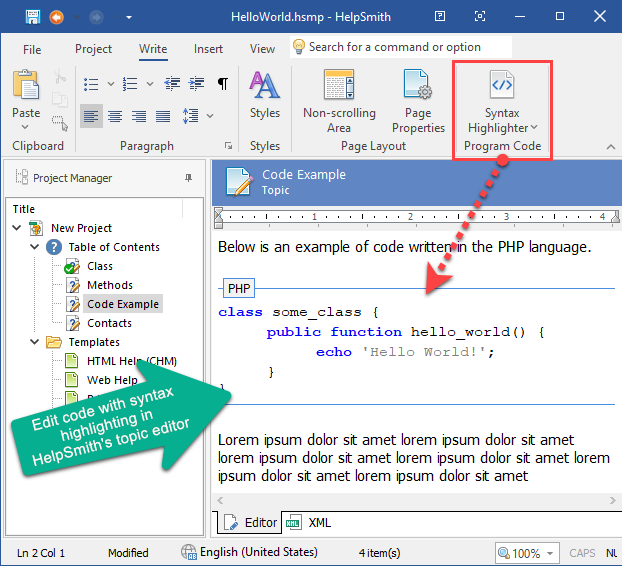
How to Format Program Code in a Topic
- In the topic editor, select the code that you want to format.
- On the Write tab, in the Program Code group, click the lower half of the Syntax Highlighter button.
- In the popup menu, select the programming language in which this code is written.
Remark: If the language that you need is not listed in the popup menu, click Customize to enable it.
Spell Checker Now Ignores Text in the Code Blocks
In addition, while the HelpSmith’s word processor automatically checks the topic’s content for spelling errors, it now ignores the content within code blocks as this content mostly contains keywords, identifiers, and other elements of a programming language.
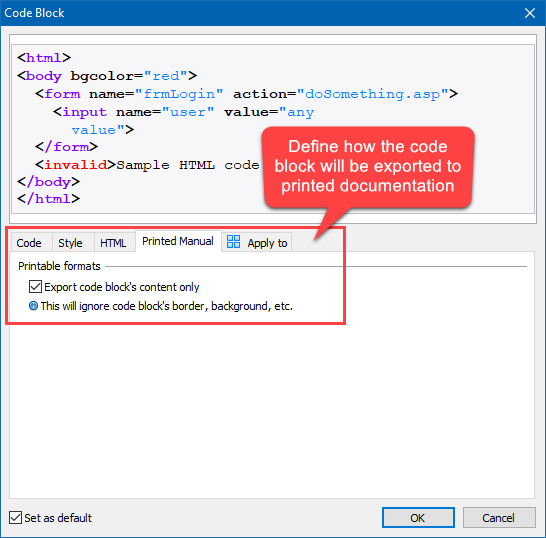
Define the Look and Feel of the Code Blocks Easily
The HelpSmith’s Syntax Highlighter tool allows you to insert code blocks in all output formats including Web Help, HTML Help (.CHM), ePub, Adobe PDF, and Word documents, and you can easily define the style settings for the code blocks in the compiled documentation.
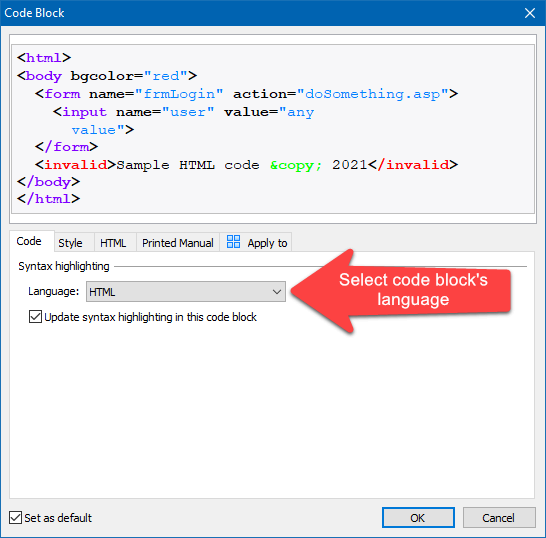
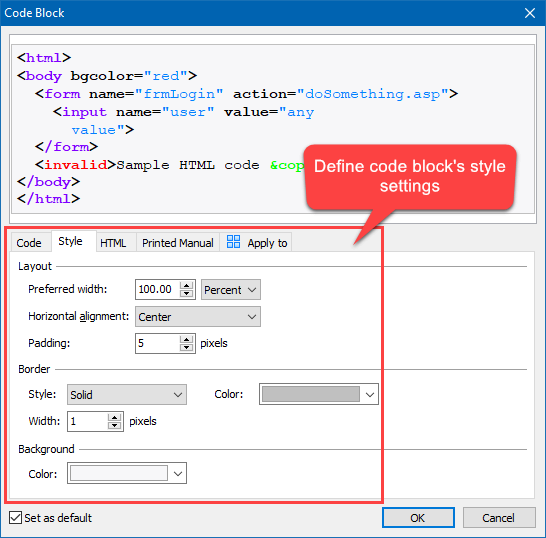
How to Edit Properties of a Code Block
- In the topic editor, double-click on the start bound of the code block that you need.
- In the Code Block dialog, specify the Language, Style, and other settings.
- Click OK.
For example, in the properties of a code block, you can specify the code block’s width, background, border, colors, and other settings.
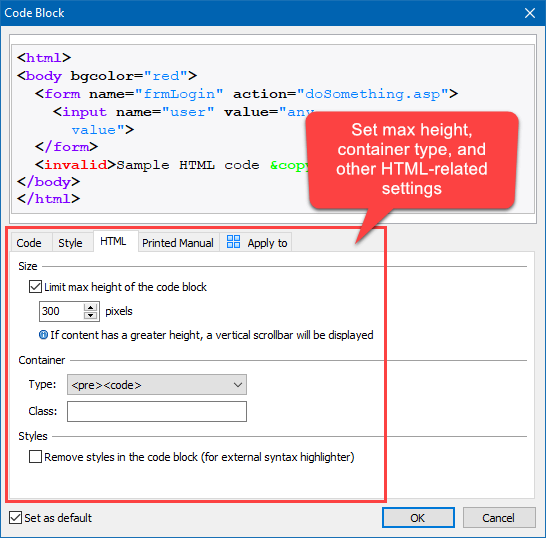
Code Blocks in Web Help, HTML Help (CHM), and ePub Formats
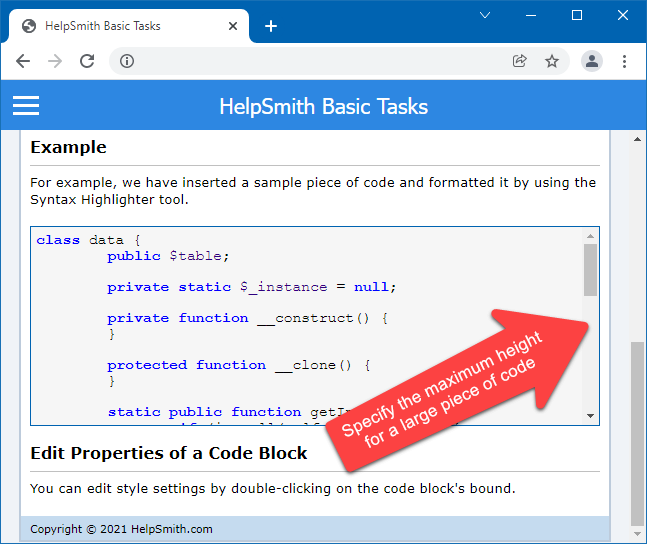
In HTML-based documentation formats, such as Web Help and CHM help files, HelpSmith also allows you to specify a maximal height value, which means that if the content of a code block has a greater height, a vertical scrollbar will be displayed. Thus, you can easily demonstrate large code pieces in a topic.
Finally, HelpSmith allows you to set the container type (<pre>, <code>, etc.) and specify the class attribute, which can be used if you prefer to use an extra syntax highlighting JavaScript plugin in your documentation.
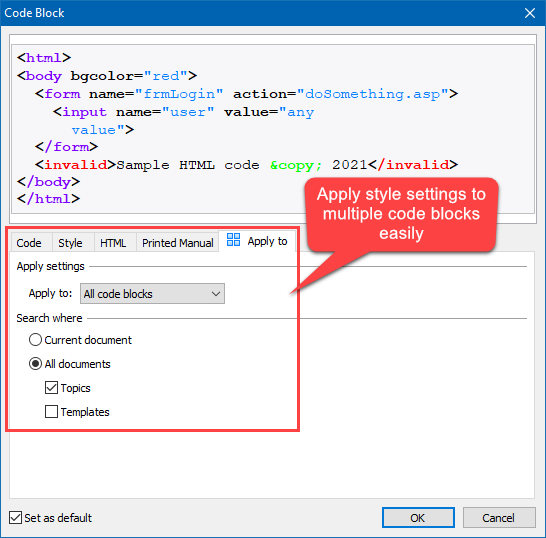
Applying Style Settings to Multiple Code Blocks
It should be noted that HelpSmith allows you to apply settings not only to an individual code block, but also to multiple code blocks in the current topic, or even in the entire help project. Thus, you can update the appearance of numerous code blocks in your help project easily!
Change the Style of Horizontal Lines in a Couple of Clicks
While working on the formatting of a help topic, technical writers often use horizontal lines to divide the topic’s content into sections and sub-sections. So a help project can contain one or more kinds of horizontal lines with different style settings, which in the result makes finding the information in the topic easier.
Applying Properties to Multiple Horizontal Lines
In HelpSmith 9.3, you can now setup and update the size, alignment, and color settings not only for an individual horizontal line, but also for multiple horizontal lines located in a specific topic, or even in the entire help project.
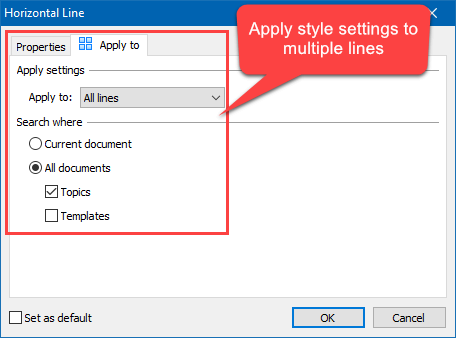
For example, if you need to change the color of horizontal lines, you can edit properties of an individual horizontal line as usually, but apply the new properties to multiple horizontal lines in all the topics of your help project.
How to Update Different Sets of Horizontal Lines
If you have more than one set of horizontal lines, which use different style properties (for example, color), HelpSmith allows you to apply the updated settings only to the horizontal lines of the same kind.
So just like you can use HelpSmith’s dynamic styles to define formatting of texts, you can now define the style of numerous horizontal lines in your help project in just two clicks!
Remark: Before using the new Apply To option, we recommend that you save your help project (by clicking: File|Save) first, so you will be able to see the modified topics in the Project Manager, review the changes, and thus prevent any undesired results.
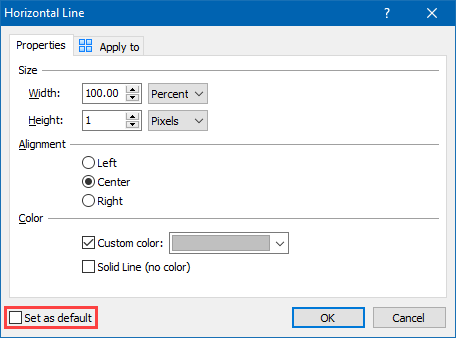
Define Default Settings for a New Horizontal Line
In addition, you can now use the “Set as default” option allowing you to define the default settings for a new horizontal line, and thus avoid having to copy an existing line every time.
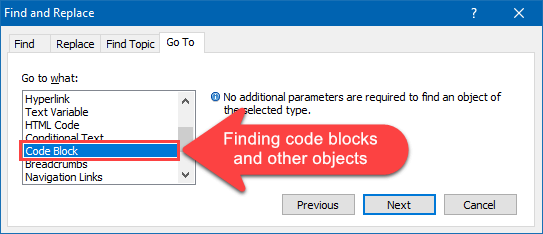
Use the Go To Feature to Find Code Blocks in Your Help Project
For a technical writer, it is important to have the possibility to find code blocks contained in the entire help project. Therefore, we have extended the HelpSmith’s Go To feature (which you can access by pressing: Ctrl+G), so you can easily find code blocks in the topics similarly to other objects, such as images, tables, hyperlinks, variables, and so on.
Better HTML Export for SEO-Friendly Documentation
HelpSmith 9.3 also includes improvements to the internal HTML generation engine which is used when you compile documentation in the Web Help (.HTML), HTML Help (.CHM), and ePub eBook formats.
Export of Headings into HTML Documentation
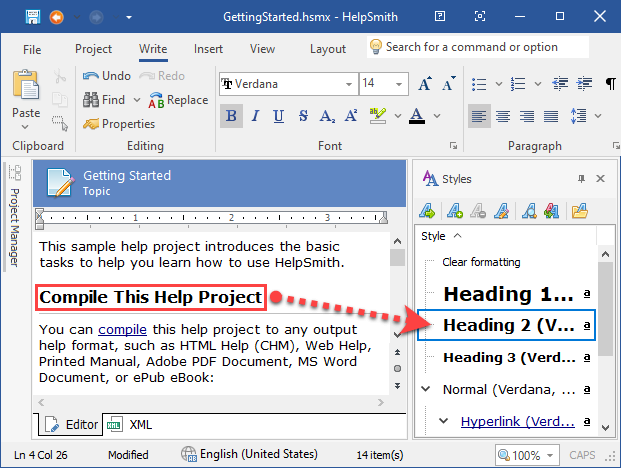
Now when you apply heading styles (e.g. Heading 1, Heading 2, etc.) to the titles in a topic (or template), the headings are exported to the HTML format by using the appropriate HTML tags (e.g. <h1>, <h2>, etc.). So the generated HTML document preserves the topic’s structure, which makes it easier for search engines to index the content in a published Web Help system.
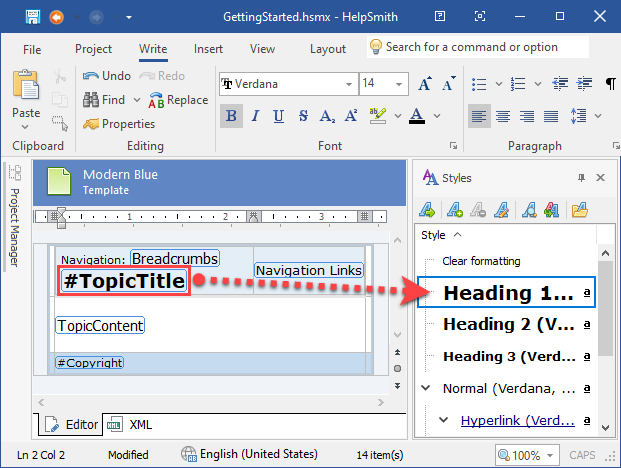
Remark: It should be noted that the default templates (e.g. Modern Blue, MSDN Style Blue, Simple Black, etc.) now link the #TopicTitle placeholder to the Heading 1 style. However, in an existing help project, you may need to link it with the heading style manually.
Friendly Filenames for Rendered Images with Annotations
Beside that, when you compile a help project that contains images with annotations, such as control annotations or other kinds of objects (which you can add by using the HelpSmith’s Image Tool), HelpSmith now exports such images using friendly filenames.
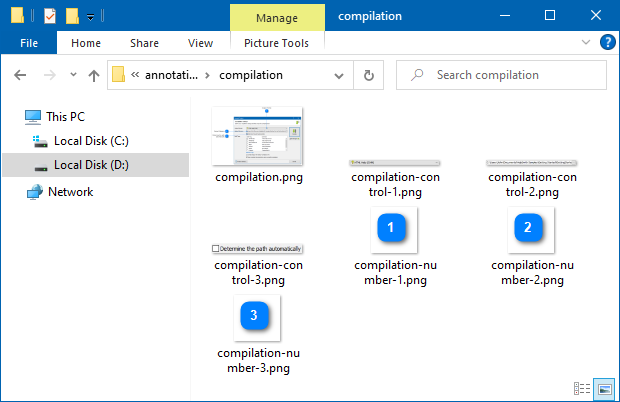
So you can easily find and identify the rendered images in the Web Help’s output folder.
Release Notes for HelpSmith 9.3
- Full-featured code blocks with customizable style, and the ability to edit program code with syntax highlighting in the HelpSmith’s topic editor.
- The ability to change properties of multiple horizontal lines in the current topic, or in the entire help project.
- It is now possible to set default settings that will be used for a new horizontal line.
- In HTML-based formats (CHM, Web Help, ePub), headings in a topic are now exported using the <h1>, <h2>, and <h3> tags.
- The #TopicTitle variable in the default templates (e.g. Modern Blue, etc.) is now linked to the “Heading 1” style.
- The Go To feature now allows you to find code blocks in the the entire help project.
- Images with annotation objects are now exported using friendly filenames.
- Spell checker now skips content of the code blocks.
- Other enhancements and minor bug fixes.
How to Upgrade
If you have a license for HelpSmith 9.x (or for a previous version for less than a year), you can upgrade to the latest HelpSmith version (the same edition) for free. Otherwise, you can upgrade existing licenses to HelpSmith 9.x at a special price. To place an upgrade order, you can visit this link.
Download HelpSmith 9.3
You can download the latest HelpSmith version here.