
We are pleased to announce the release of HelpSmith 9.8 (which you can download from our website) that now allows you to generate documentation in the Markdown format, includes improvements to the Markdown and Word import features, and other enhancements.
Generate Markdown Documentation from Your Help Project
The Markdown format allows technical writers to use simple and intuitive syntax to add formatting elements to a plain text file, and thus, provides an easy way to produce structured and formatted documents which can be read on any computer or mobile device, published on a website, printed on paper, or, if necessary, converted into other formats.
Because the Markdown format is used everywhere and supported by many popular desktop applications, content-management systems, and web-based services (including GitHub, StackOverflow, WordPress, Reddit, etc.), it makes it possible for you to create content by using different text editors, which simplifies collaboration between technical writers, engineers, and other professionals.
Therefore, HelpSmith 9.8 now allows you to generate Markdown documentation from your help projects similarly to other output formats, allowing you to use different text formatting settings in your topics, apply topic templates, use Build Tags to produce different versions of your documentation, use image annotations for UI documentation, use code blocks for API documentation, re-define text styles, use variables, related links, setup compilation tasks, and use other powerful features provided by the HelpSmith help authoring tool.
How to Compile Your Help Project to the Markdown Format
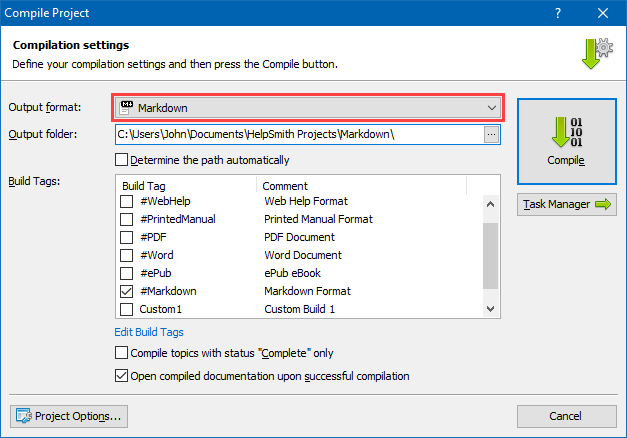
- On the Project tab, click Compile.
- In the Compile Project dialog, in the Output Format box, select Markdown.
- Click Compile.
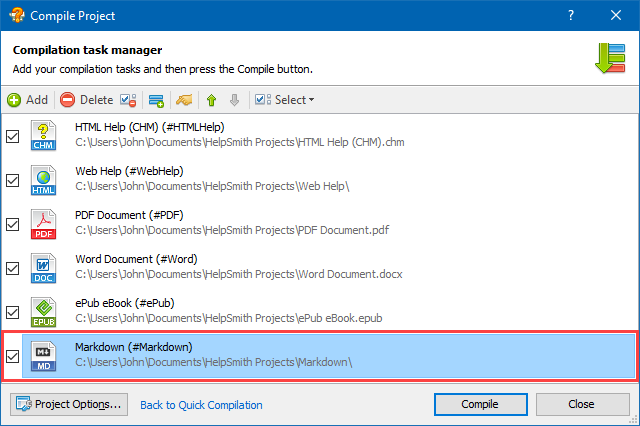
Remark: Alternatively, you can also use the Batch Compilation mode to setup different compilation tasks and generate documentation in multiple output formats including the Markdown format.
Finally, the HelpSmith’s ability to generate Markdown documentation, and also to import content from Markdown (.md) files (which was introduced in the previous update), provides better compatibility of HelpSmith with other applications and simplifies the process of migration between different documentation tools.
Flexible Options to Control the Markdown Generation Process
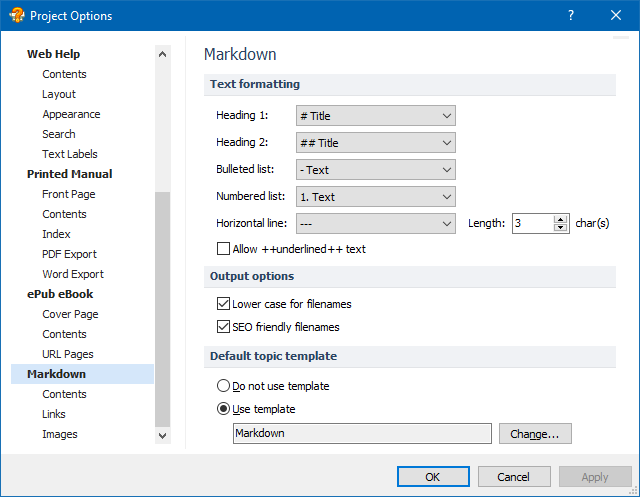
HelpSmith provides flexible options that you can use to customize the formatting and control the Markdown documentation generation process according to your needs.
For example, you can specify the preferred syntax to use for various Markdown elements, such as headings, bulleted and numbered lists, horizontal lines, etc.
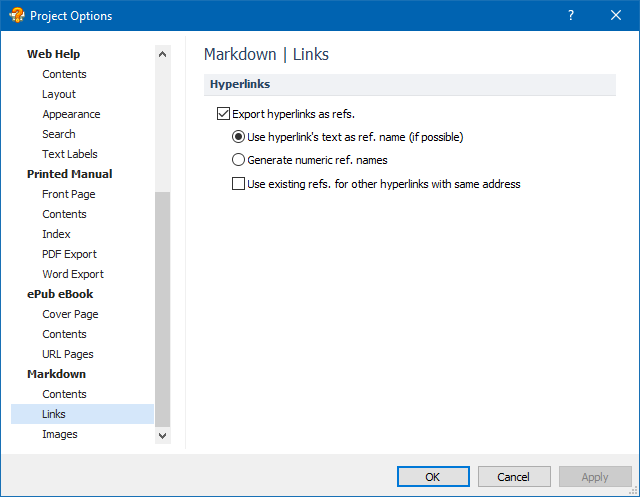
Also, you can specify how the hyperlinks will be defined within the generated Markdown files:
- Embed the URL address of the hyperlinks directly into the text.
- Export hyperlinks as references at the bottom of the markdown document.
And if you prefer the second option, HelpSmith can assign the names to the references by using either the texts of the hyperlinks, or by using ordinal numbers.
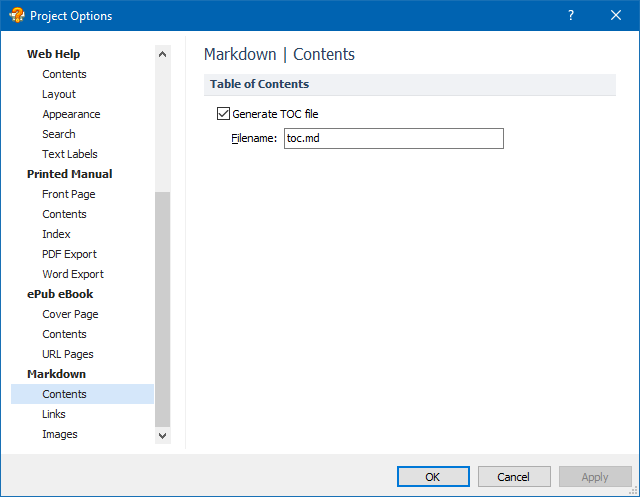
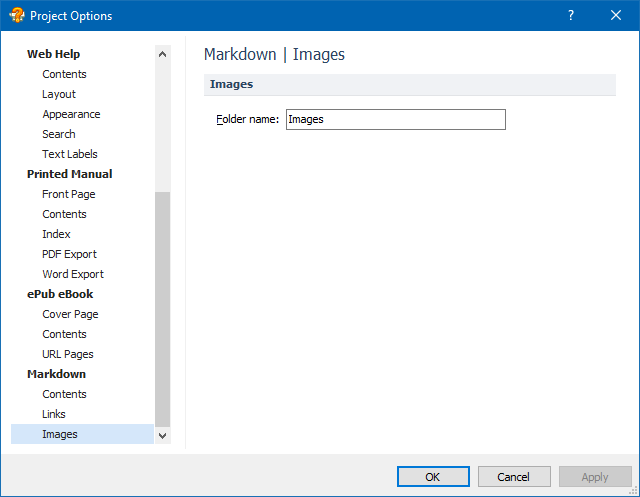
Finally, HelpSmith allows you to define the name of the Images folder that will store the image files of your Markdown documentation.
Using Image Annotations in Markdown Documentation
The HelpSmith’s Image Tool is a great way to create documentation for the user interface of your desktop application or web-based service as it allows you to:
- Capture and prepare screenshots of the application.
- Annotate images by using customizable annotations (e.g. arrows, shapes, balloons, text labels, etc.).
- Generate topic drafts for a specific window to explain the use of individual controls (or groups of controls).
As a result, the Image Tool lets you to convey the information (for example, software instructions) to the end users in the most efficient way.
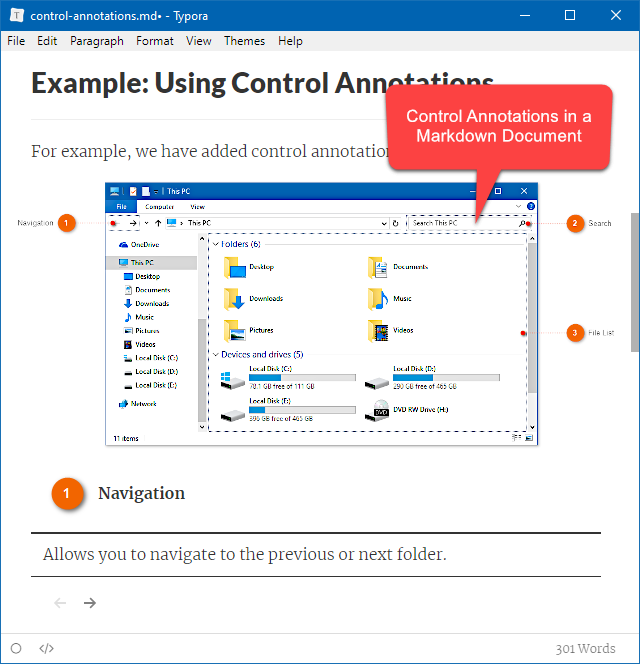
And despite a Markdown document is technically a plain text file, it allows you to use images, tables, and other elements in it. This, in turn, means that HelpSmith allows you to use annotation objects and control annotations in your Markdown documentation in the same way as in the other output formats like CHM help file, Web Help system, or PDF manual.
Remark: It should be noted that when HelpSmith exports a topic into a Markdown file (.md) during the compilation process, it renders the images with annotations and places the rendered image files to the appropriate output folder. Also, HelpSmith automatically adjusts the annotation tables which describe the UI elements below the screenshot, so these tables will be correctly displayed by different Markdown viewers.
Creating Markdown Documentation with Code Snippets
In HelpSmith, you can use the Syntax Highlighter feature to insert full-featured code blocks whose style and behavior can be customized as you need, which makes it possible for you to create API documentation, program specifications, and any other documentation that contains code examples written in various programming languages (e.g. C++, PHP, Python, JavaScript, HTML, etc.).
It should be noted that when exporting a code block to a specific output format, HelpSmith uses the code block’s special settings taking into account the possibilities and limitations of the given format, so the code block will work in the generated documentation properly.
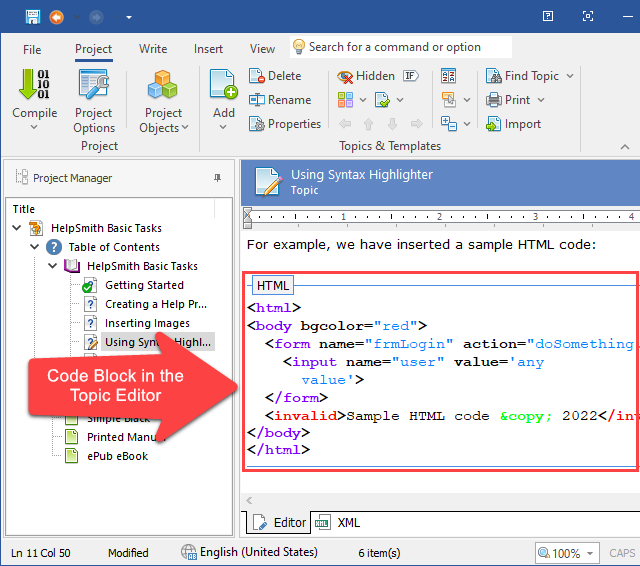
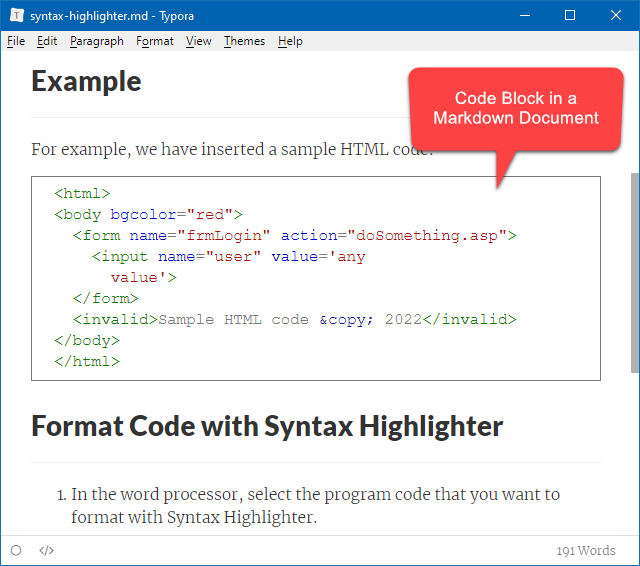
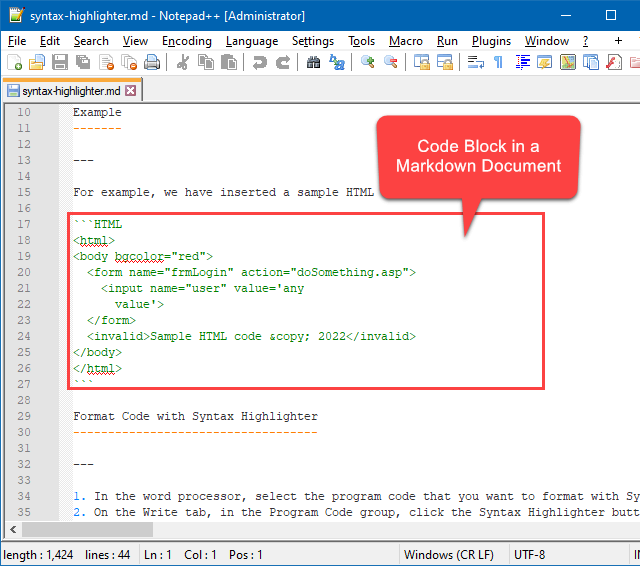
In the Markdown format, HelpSmith allows you to specify the name of the programming language used by a code block, so the code block will be displayed in various Markdown viewers by using the appropriate syntax highlighting scheme.
Thus, as a software developer, you can use the HelpSmith help authoring tool to produce Markdown documentation with code snippets, and to import such documentation from the Markdown format (.md) as well.
Improvements to the Markdown and Word Import Features
HelpSmith 9.8 includes enhancements to the Import capability that allows you to import documentation from various formats including Word documents (.DOCX, .DOC, .RTF), Markdown files (.md), HTML files, compiled .CHM files, and other formats.
The Markdown Import feature (which was introduced in the previous HelpSmith update) adds support for the superscript and subscript text, which can be denoted in a Markdown document by using the <sup>superscript text</sup> and <sub>sunscript text</sub> HTML tags respectively.
While importing Markdown files (.md), HelpSmith uses the title of the imported documents to generate the ID values of the topics. For example, if a document includes a title (defined as Heading 1 within the document) named “How to Make a PDF Document”, the imported topic will get the ID value like “How_to_Make_a_PDF_Document”, which is useful when importing multiple files.
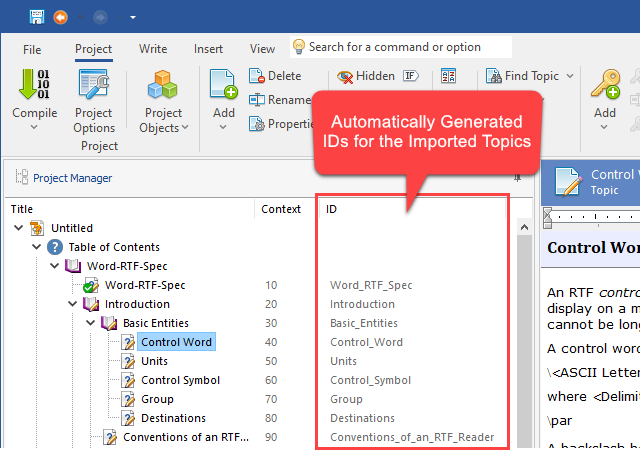
Similarly, when you import and split a Word document into topics (by outline levels, or by font size values of the headings), HelpSmith now also generates and assigns the ID values of the topics by their titles. So if you create documentation by importing content from a Word document, you do not have to edit the IDs of the imported topics manually!
Release Notes for HelpSmith 9.8
- Now you can generate Markdown documentation from your HelpSmith projects.
- The Import from Markdown feature (File|Import) adds support for the superscript and subscript text.
- The Import from Word feature now generates textual IDs by the titles of the imported topics.
- Added a button to quickly access page layout settings at the top of the vertical scrollbar.
- The Table of Contents tree now uses a sorting method (Project tab|Sort) which sorts nodes by alphabet, plus by numbers if any are found (For example: Topic 1, Topic 2, …, Topic 10, and so on).
- The Select Folder dialog (File tab|Import|Import Folder) sorts the file list which also takes into account the numbers contained in the filenames.
- The Topic Editor now remembers the state of Show Non-printing Characters option for the next HelpSmith start.
- The Image Tool now allows you to change the maximum width of the control annotations’ titles.
- Other enhancements and minor bug fixes.
How to Upgrade
If you have a license for HelpSmith 9.x (or for a previous version for less than a year), you can upgrade to the latest HelpSmith version (the same edition) for free. Otherwise, you can upgrade existing licenses to HelpSmith 9.x at a special price. To place an upgrade order, you can visit this link.
Download HelpSmith 9.8
You can download the latest HelpSmith version here.