
Working on a help file or manual in HelpSmith (which you can download from our website), you can easily add images, capture screenshots, add various annotations, insert videos, and other visual elements that allow you to complement the texts of your documentation, and efficiently convey a specific topic to the end-users.
However, as a user of the HelpSmith help authoring tool, you may have different questions related to the usage of images and videos, image annotation tools, management of your media files, etc.
In this post, we will try to answer to the most frequent questions on using images and videos that we get from HelpSmith users.
The Media Repository of Your Help Project
The Media Repository (which you can access by clicking: Project|Project Objects|Media Repository) contains all the image and video files that are used in your help project. In the Project Media window, you can add a new image or video file, update an existing media file, organize the media files by adding folders, identify and remove unused images and videos, and perform other actions.
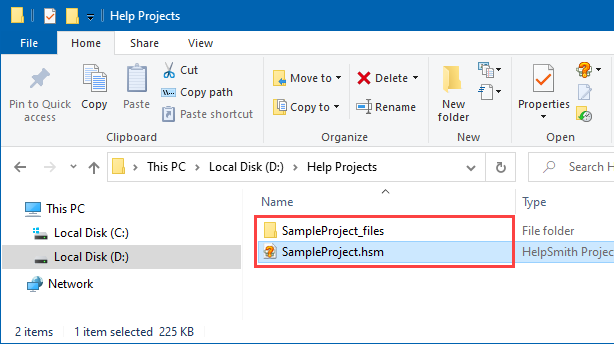
Please note that when you save your help project by clicking the File|Save (Ctrl+S) command, HelpSmith will also save the project’s Media Repository to a folder named like “YourProjectName_files” in the same directory as your .HSM project file.
Inserting an Image or Video into a Help Topic
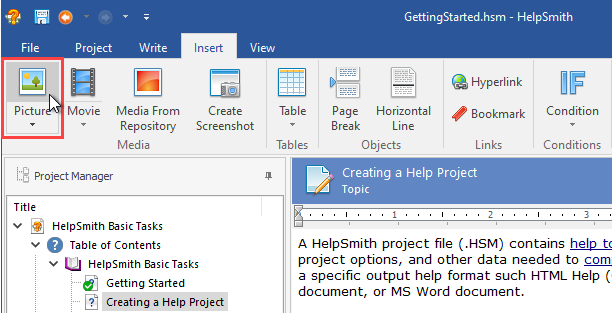
Writing the content of a help topic, you can insert an image or video directly into the topic editor. For example, you can insert an image from a file (by clicking: Insert|Picture), insert a video from a file (by clicking: Insert|Movie), paste an image contained in the Clipboard (by clicking: Write|Paste), or capture a screenshot by using the built-in Image Tool (by clicking: Insert|Create Screenshot).
In all of these cases, HelpSmith will automatically copy the inserted image to the Media Repository of your help project, so you will never have to worry about the original locations of the media files.
Re-using an Image or Video in Other Topics
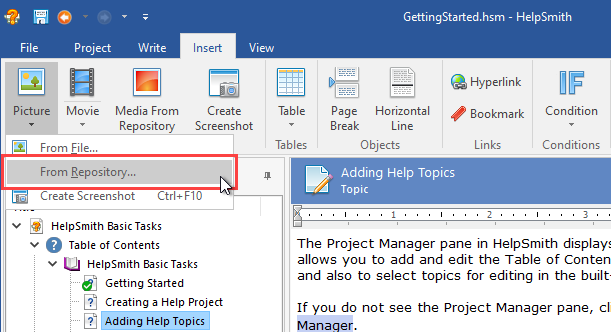
HelpSmith allows you to insert a media file that already exists in the Media Repository, so you can re-use an image or video in more than one help topic:
- On the Insert tab, click Picture (on the down-arrow icon at the bottom part of the button).
- In the drop-down menu, click From Repository.
- Select the media file that you need.
- Click Insert.
Please note that if an image or video is used in multiple topics, you can easily update such a media file (for example, a screenshot with its newer version) in a single place, without the need to edit each topic containing that screenshot.
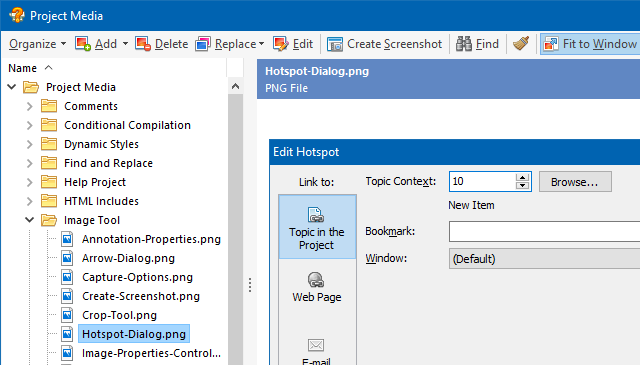
Using Annotations, Control Annotations, and Hotspots
HelpSmith allows you to modify any image by adding various kinds of annotations (balloons, rectangles, arrows, lines, text labels, etc.), control annotations for UI elements (which can be exported directly into the topic), clickable hotspots (to create links from a specific region of an image), or by cropping unwanted parts of the image.
To open an image for editing in the HelpSmith’s Image Tool:
- In the topic editor, hover the mouse over the image that you want to edit.
- In the top-left corner of the image, click the Edit Image button.
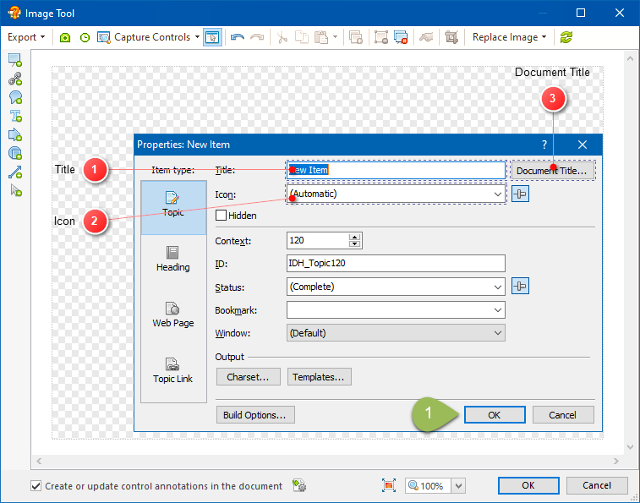
It should be noted that the annotations, control annotations, hotspots, and other objects that you can add to an image are stored in the image object in a specific topic, but do not modify the corresponding image file, which is located in the Media Repository.
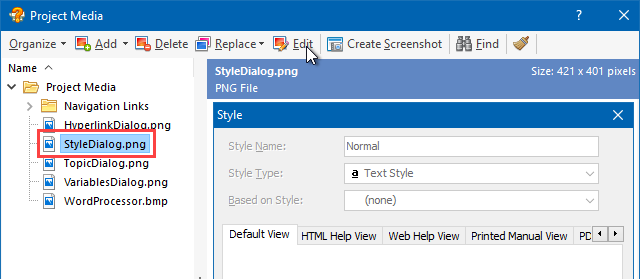
How to Update an Existing Image or Screenshot
If you need to update a screenshot, you can open an image for editing in the Image Tool and use the “Replace Image” button available on the toolbar. However, using this way, you will update only the image object in the specific topic. Also, this method will add the updated screenshot as a new file to the Media Repository of your help project.
Therefore, to update a screenshot (which can be used in multiple topics), you can open the Project Media window (by clicking: Project|Project Objects|Media Repository) and update the image file directly by using the “Replace” or “Edit” button, as described in this topic.
Please note that after you have updated an image file, you may also need to adjust the positions of annotations, hotspots, and other objects used by the appropriate image objects in the topics. If necessary, you can use the HelpSmith’s Go To (Ctrl+G) feature that allows you to find the images in the topics by a specific filename.
How to Update the Style and Formatting of the Annotation Tables in a Topic
HelpSmith allows you to customize the style of control annotations that are used for UI elements shown on a screenshot, and also the style and formatting (e.g. font, color, etc.) used by the annotation tables that are exported directly into the topic:
- In the topic editor, hover the mouse over the image, and then click the “Edit Image” button that appears.
- In the Image Tool, on the toolbar, click Image Properties.
- In the Image Properties dialog, on the Control Annotations tab, setup the desired style for control annotations.
- In the Image Properties dialog, on the Export tab, setup the title font, description font, table width, and other settings.
- In the Image Tool window, ensure to check the option “Create or update control annotations in the document”.
- Click OK.
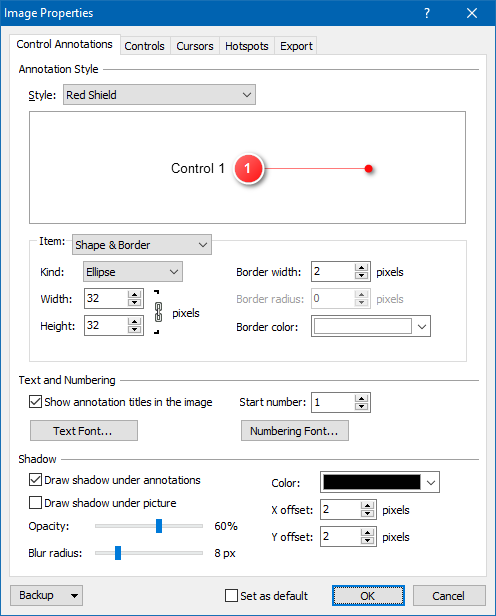
After this, HelpSmith will automatically update the annotation tables in the topic by using the new style and formatting settings.
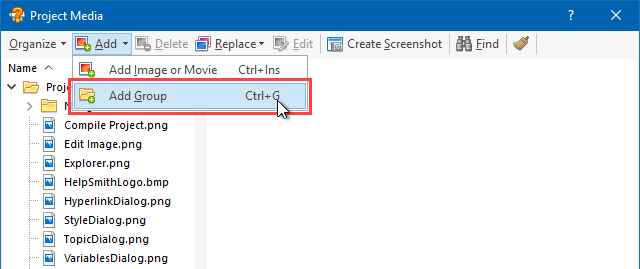
How Do I Organize My Media Files?
Working on a help project, you may need to rename default filenames, and also organize your media files into folders based on their subject.
Using the Project Media window (which you can access at: Project|Project Objects|Media Repository), you can assign a desired name to the selected file or folder by clicking the Organize|Rename (F2) command, create folders (groups) by clicking the Add|Add Group (Ctrl+G) command, and also drag-and-drop selected items into a different parent group.
If necessary, in the Project Media window, you can select multiple files by using the mouse, or by clicking on individual files while holding down the Ctrl key.
Remark: Please note that any changes that you have made to the Media Repository will apply to the physical folder (“YourProjectName_files”) after you save your help project by clicking the File|Save (Ctrl+S) command.
How to Insert a Video Located on YouTube
While this post is mostly dedicated to the usage of embedded image (e.g. PNG, JPG, etc.) and video files (e.g. MP4 files), you may also need to insert a video that is located on YouTube, Vimeo, or another video hosting.
To insert a remote video into a topic, you can use the HelpSmith’s ability to embed custom HTML code (Insert|HTML Code). Using this feature, you can simply copy the HTML code of a specific video from YouTube, and then insert the code into the desired place in a topic.
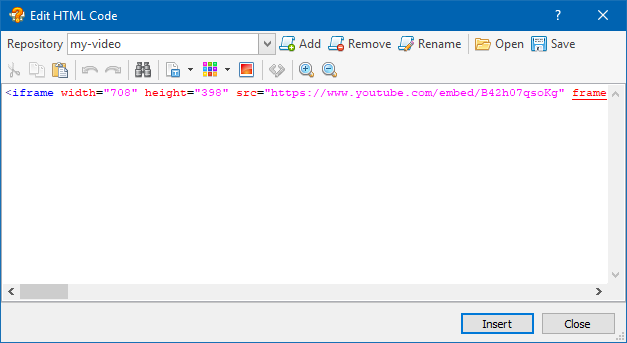
For the instructions on inserting a video from YouTube, you can visit this topic.
Why Are Images Not Displayed in My Help Project?
If you have opened a help project, but HelpSmith does not display images in help topics, or in the Project Media window (Project|Project Options|Media Repository), make sure that:
- The directory containing your .HSM project file also contains the media repository folder, which must be named like “YourProjectName_files”.
- The media repository folder (YourProjectName_files) actually contains the appropriate image files.
In most cases, this problem occurs after copying or moving a .HSM project file to another computer or storage device without copying the media repository folder of the help project. For more details on copying or moving an entire help project, you can also visit this post.
Download HelpSmith
As a help authoring tool, HelpSmith offers not only great content writing features, but also excellent screenshot creation, image annotation, and image management capabilities. So if you are looking for a help authoring tool, you can download the free evaluation version of HelpSmith to check if it completely suits your specific needs. Also, if you have any questions, you can always contact us by submitting a support ticket.